Showing posts with label gravy. Show all posts

Sunday, April 5, 2020

Recipe: Ngohiong Sauce Recipe

I have been frequently bringing ngohiong as pasalubong to different places in the Philippines. But unfortunately, I can only bring the frozen, half cooked ones through the airport customs not including the sauce (liquids are prohibited). 

I am talking about the street food variety ngohiong. These are the ones most popular with the masses and blue collared workers alike because they are cheap and tasty as well. I remember having this in college for P2.50 a piece. And what is ngohiong without the spicy-hot gravy-like sauce mixed with vinegar and soy sauce. To quote Rosemarie Garcia of Caro and Marie Culinary School where I took a crash course on ngohiong making, "Walay kalag ang ngohiong kung wala ang sauce." (There is no "soul" in a ngohiong without the sauce). Absolutely true. 

This recipe is for the sauce only. Recipients of this Cebuano pasalubong can now make their own sauce to pair with this delectable and crunchy dish. Take it from me, it's still an authentic sauce because it's concocted by a Cebuana *wink*. 

Preparation time: 15 minutes
Makes one cup of sauce. 

Ingredients:
  • 1 tbsp all purpose flour
  • 1 tbsp oil or drippings
  • 1/4 tsp chicken powder or crushed chicken cube ( I prefer the powder though)
  • 1 cup water
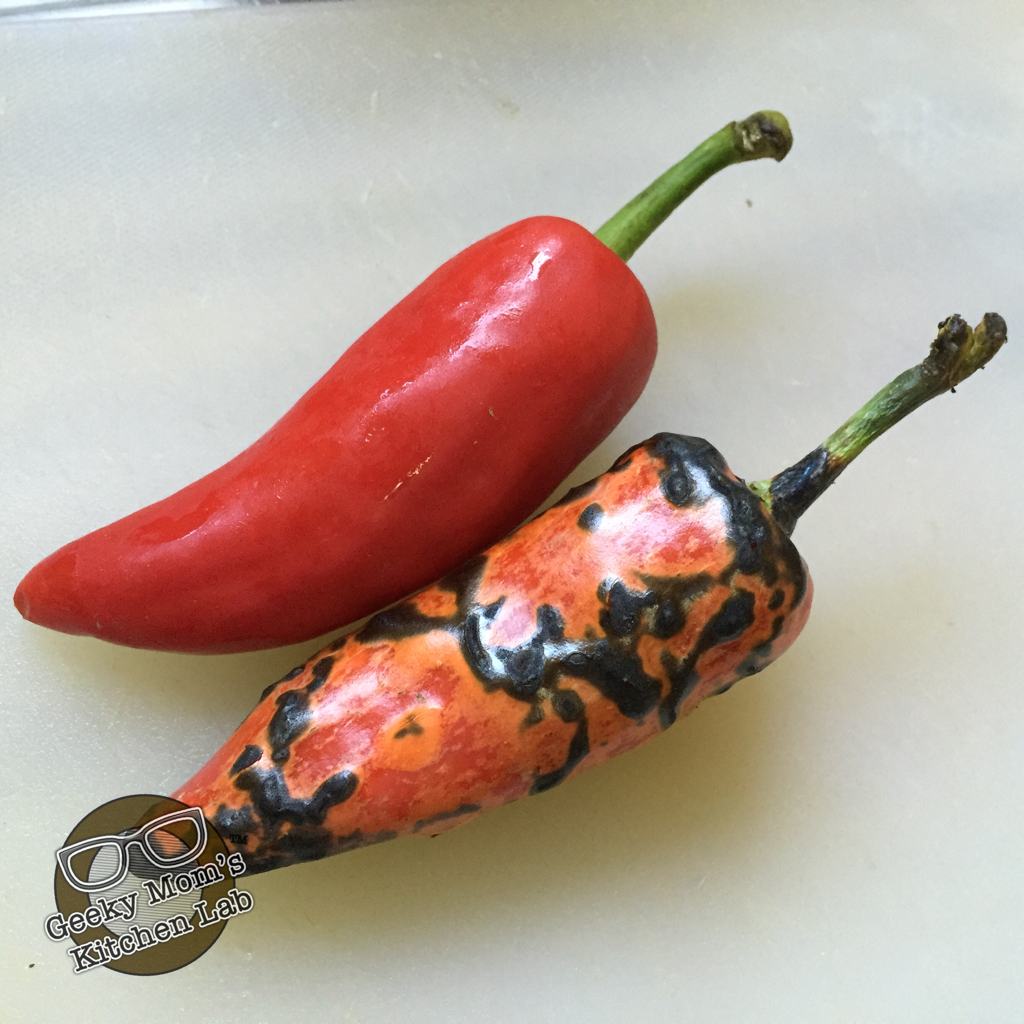
  • 3 -5 pcs birds eye chili or ailing labuyo, chopped (one to five pcs doesn't really make any difference since. Want it ten-twenty pieces? Go ahead)


Procedure:
  1. Dissolve the flour in the oil to make a roux.
  2. Heat in a saucepan and add the chicken powder, water and the chili
  3. Heat until it thickens. 
  4. Cool before transferring to a sauce bottle. 


To serve, mix equal amounts of vinegar and soy sauce in a sauce bowl. 
Pour the spicy-hot gravy into the mixture according to your "hotness level". 
Dip away. 

This ngohiong is from Hukad. About P75 per serving (5 pcs). Prices came a long way since then. (Originally wrote this in 2015)
Read More »

Tuesday, September 24, 2019

Recipe: Manong Fishball's Sauce

Serve the sauce in glass jars for that rustic feel.

From time to time, I get this squid balls craving whenever I pass by a street vendor selling fish balls or squid balls. Hot off the frying pan and dipped in their homemade sauce. Hmmm, yummy! But I get hygiene issues when it comes to their sauce.  No double dip rule applies to all of the vendors I've known but what about storing it at the cart over several hours under the sweltering heat of the sun? Salmonella alert! I have nothing against the vendors and I don't think they deliberately spoil the sauce. They might may carry a cooler perhaps as a precaution. But I've eaten more than a dozen times and I'm still okay.

Yet, it's more practical if you make one yourself at the comfort of your own home. You get it anytime you want it without looking for manong fishball out there. This recipe is from the one I got from the Internet ( yeah, you can almost get anything from the Internet including fish balls) tweaked and scaled down the measurements to a minimum so I can use only a small amount for my family's consumption. The sauce can only keep for about a week. Discard the rest afterwards. This is good for a cup or so of the sauce. 

Dip away!

This is the squid ball brand I buy. Akai Foods brand. Texture is just right when fried... Crunchy on the outside and soft, chewy and firm on the inside. About P190/ kilo. 


I like to put them in slim and tall jars, that way it gets the sauce all over the balls. 


Manong Fishball's Sauce

by Jenny Sibi
Prep Time: 15
Cook Time: 15
Ingredients (1 cup)
  • 1 cup water
  • 11/2 tsp soy sauce
  • 1 tsp Mama Sita's Barbeque Marinade ( gives it a barbeque flavor)
  • 2 tbsp sugar
  • 1/2 tsp chili sauce ( I used the takeout one from Dimsum Break :) or
  • 1 pc siling labuyo chopped (optional)
  • 1/2 tsp onion minced
  • 1/2 tsp garlic minced
  • Slurry: This is the thickener. If you can find the Camote Starch, Camote Flour or Camote Powder, the better. It stabilizes the sauce better than cornstarch. Camote Powder is used in making Maki or Maki Mi.
  • 1 tsp. camote Flour
  • 1/2 cup water
Instructions
Procedure:
Combine the first 8 ingredients. Bring to a simmer and simmer for about 2-3 mins.
Mix the camote flour and water.
Pour this slowly in the simmering sauce. Little by little until you get the right consistency you want.
Pour the sauce inside a sterilized glass jar with lid.
Powered by Recipage
Read More »

Thursday, July 21, 2016

How I prepare my Pork Steak or any steak.


The I happen to spot these beautiful pork steak cuts at the butcher shop yesterday and decided to make Pork Steak ala Pobre at home. 

I marinate the cuts with worschestershire sauce, light soy sauce and cracked black pepper. Just enough to moisten the meat not to soak them. My grandma taught me to add cornstarch to the surface of the meat to seal in the juices when searing. 


In a hot, flat pan, drizzle the surface with a tablespoon of oil and sear the meat on one side for about 2-3 minutes. Turn them over and sear the other side and add a tablespoon of butter, 2 cloves of crushed garlic and a teaspoon of dried rosemary. 


Spoon the melted butter, garlic and rosemary all over the meat. Turn off heat and transfer the steak to an ovenproof dish and finish cooking in a turbo broiler for another 10 minutes or so. 


GRAVY
In the same pan, add more butter and slices of fresh mushrooms. Sprinkle about a tablespoon of flour and mix them well over low heat make a roux. Add water and chicken powder mix to taste and stir until thickened to make gravy. You may add additional Worcester sauce to brown the gravy further. 

Assemble everything in a serving dish with buttered veggies and mashed potatoes. 

Happy eats!


Read More »

Friday, November 20, 2015

Recipe: Basil Garlic Pesto


Nothing beats a fresh pesto specially when its homemade. Not only it is cheaper, but you get to use the finest ingredients that you can afford. I usually get my sweet basil at the farmer's market because its freshly picked and more flavourful than the ones packed inside the grocery.

This is your usual basic pesto using garlic, fresh sweet basil, olive oil and salt. You may add pine nuts and use other recipe variations that you like. I roast my garlic beforehand to remove the bitter taste and make the flavour more intense. Perfect on toast, pasta and the recipes that calls for homemade pesto.

Preparation time: 30 minutes

Ingredients:

  • 1 whole bulb garlic
  • A drizzle of olive oil
  • A small piece of aluminum foil just big enough to cover the whole garlic
  • Handful of pine nuts or almond nuts, ground. 
  • 250 grams sweet basil, washed and spin-dried well
  • Extra virgin olive oil
  • Pinch of salt
  • Parmesan cheese


Procedure:

  1. Slice the top of the whole garlic just enough to expose the flesh inside. 
  2. Place on top of the aluminium foil and drizzle olive oil over it. Cover tightly.
  3. Broil under a stove-top flame for about two minutes, just enough to heat it. Careful not to char the garlic.
  4. Let it cool and open the foil. Squeeze the garlic to remove the flesh. It will be easy like squeezing toothpaste out of a tube. Set aside.
  5. Place the basil, roasted garlic and a quarter of a cup of extrra virgin olive oil in a food processor.
  6. Process on pulse while adding more olive oil and a pinch of salt until it reaches to your desired consistency.
  7. The pesto should be fine and spreadable with a small amount of olive oil floating on top.


Read More »

Recipe:: Ripe Mango Salsa


This salsa is a perfect alternative to the usual gravies and sauces on meat, fish and poultry. It is also yummy as a dip and a dressing. In this recipe, instead of adding the usual raw onions which other people don't really like, I cooked them lightly with olive oil just to sweat them. I added roasted pimientos instead of red bell peppers so as not to overpower the salsa. The smoky flavor of the roasted pimientos goes well with the rest of the ingredients.

Preparation time: 30 - 45 minutes
Yields about a cup

Ingredients:

  • 1 piece medium onion, diced
  • 1 piece pimiento, roasted and diced
  • 1 piece jalapeño, seeded and sliced thinly
  • 1 piece ripe yellow mango, diced
  • A handful of cilantro, chopped
  • 2 tbsp. olive oil
  • A pinch of ground turmeric
  • Pinch of salt (optional)


Procedure:


  1. Sweat the onions in a tablespoon of olive oil just to release its sugars and remove the bitter taste, Set aside.
  2. Broil the whole pimiento under the flame until the skin is charred.
  3. Peel and remove the seeds and then dice them.
  4. Add all the ingredients together in a glass bowl, drizzle with the remaining olive oil.
  5. Store in an airtight container. This should last about a week or so in the fridge.

Read More »

Friday, December 5, 2014

Recipe: Eggplant Dip with Malunggay


I know. Majority never really likes eggplants, aubergine, whatsoever. My kids never liked this dip when I initially made this either. It was supposed to be a rustic dish that I simply mashed it with a fork. My son specifically said, "Eww, I hate eggplant. It's so mashed up that I can still see bits of everything in it. It's like actually seeing of what it looks like in my digestive system." Okay, I get it.

To refine what I made, I simply turned to my trusty food processor. I pureed the dip, added a drizzle of olive oil and a squeeze of lemon.  The creamy texture was a hit!  I added a handful of malunggay leaves towards the end of the cooking for extra nutrition and a surprising earthy flavour that blends well with the curry and the jalapeño. It goes well with naan, crackers, toasted bread etc.

Preparation time: 30-45 minutes
Yields about 2 cups

  • 1 large eggplant (about 9- 10 inches)
  • ! tablespoon Olive oil
  • 1 teaspoon curry powder
  • 1 medium sized onion, chopped
  • 2 cloves of garlic, chopped
  • 1 piece medium tomato, chopped
  • 1 medium red bell pepper
  • 2 tablespoons toasted sesame seeds or
  • 2 tablespoons tahini
  • 1 piece jalapeño, sliced (optional)
  • 1/2 cup malunggay leaves, trimmed and washed
  • Salt and Pepper to taste
  • 1 tablespoon cilantro, chopped
  • Olive oil
  • Juice of half a lemon


You may or may not grill the eggplant. If you don't like to grill, simply slice the eggplant into cubes. If you do grill, place the eggplant on top of the grill or an open fire and roast the skin until it chars a bit. Grilling adds a nice smokey flavour to the dip. Don't worry about the blackened skin since you will be peeling this off when it cools. Place the grilled eggplant in a covered dish until it cools. At this point, you should be able to peel off the skin easily. You may wash the excess skin off with water but I can manage to peel of all the charred skin easily so I won't need to run it under running water. It only removes some of the smokey flavour that I like. Slice into cubes.


Saute the curry powder in olive oil until fragrant. Add onions, garlic, tomato, bell pepper (you may also roast the pepper beforehand if you like), sesame seeds, jalapeño (optional) and the eggplant.  Cook until everything is soft and cooked through for about three to five minutes. You may add a small amout of water to soften the veggies if the mixture is too dry.


Add the Malunggay leaves just before you turn the stove off. Let the remaining heat cook the leaves further. Season with salt and pepper. If you use tahini, add the tahini after you turn off the fire. Add the cilantro leaves last.

Transfer the mixture in a bowl and let it cool, covered. When cooled, you may mash it if you like it that way or puree it in a food processor. Drizzle with olive oil until it reaches your desired consistency. I don't like my dip runny. Finally, add a squeeze of lemon juice in the end.


Store in a covered ramekin or glass bowls and jars with sealed lid. Keeps in the fridge for about a week as long as you don't double dip.
Read More »

Printfriendly

Email this page EMAIL THIS PAGE
EMAIL THIS PAGE

Type a word and hit search.